Total Pageviews
Tuesday, July 14, 2015
Daemon tools pro advance v5.2 (cracked)
website:http://www.daemon-tools.cc/eng/downloads
DAEMON Tools Pro Advanced
Best product for optical media emulation. All DAEMON Tools features are now available in one solution — DAEMON Tools Pro Advanced
Key features
Functionality
Mount *.mdx, *.mds/*.mdf, *.iso, *.b5t, *.b6t, *.bwt, *.ccd, *.cdi, *.bin/*.cue, *.ape/*.cue, *.flac/*.cue, *.nrg, *.isz disc images to a virtual drive
Convert images from all supported formats to *.mdf/*.mds, *.mdx, *.iso
Make .iso, *.mds/*.mdf and *.mdx images of CD, DVD, Blu-ray discs
Make a compressed disc image or split the image to several files
Protect images with password
Advanced imaging features
Create or edit images with powerful Image Editor
Burn created images to media discs
Burn images with RMPS data
Compose your own images of selected type (CD/DVD disc) with preferred file system (ISO9660+Joliet, UDF)
Master bootable discs or images
Manage your Image Collection
Media devices virtualization
Emulate up to 32 DT and SCSI devices in all
Use 4 virtual IDE devices for advanced emulation
Mount images to physical IDE/SATA devices via advanced attaching functionality
Perform image mounting to local NTFS folders
Get detailed information about physical and virtual devices' properties
Customize virtual drives: change a drive letter, DVD region, etc
Advanced user interface with powerful system integration
Customize user Interface for main application and Image Editor
Use powerful Command Line Interface for automation purposes
Enable DAEMON Tools integration to Windows shell
Use File Associations to mount images right from Windows Explorer or any other file manager
Customize Windows Explorer context menu for images and virtual devices
Get quick access to your Image Catalog via Windows Explorer
Perform basic actions via handy DAEMON Tools Gadget on Windows Desktop
MountSpace - virtual disc usage statistic on-line service
Keep track of the disc image usage statistic
Find out Top 100 most popular images
Search other discs similar to yours
Search for disc images that you are missing
Browsing for most relevant gameplay videos and much more
Supported OS:
Windows 2000 SP4 32-bit
Windows XP SP3 32-bit / SP2 64-bit
Windows Vista 32-bit / 64-bit
Windows Server 2008 32-bit / 64-bit
Windows 7 32-bit / 64-bit
Windows Server 2008 R2 64-bit
Homepage: http://www.daemon-tools.cc/eng/products/dtproAdv
Installation Instructions:
1. Install Program.
2. Follow the Patching instruction given in patch folder.
3. Done, Enjoy.
DOWNLOAD HERE :CLICK ME
Windows 7 SP1 Super Lite x86 v2.0 Enero 2014
Microsoft Windows 7 SP1 Super lite x86 v2.0 Incl Activator - Team OS | 700 MB
The second version of the wonderful version ships specially designed To work on the hardware capabilities of the weak and medium efficiently Microsoft windows 7 SP1 Super lite x86 v2.0 January 2014.
Version based on the full version of Ultimate SP1 and the original Microsoft And files were deleted unimportant and unnecessary language packs them Version ships with all features in addition to the well-known figure picturesque and fascinating themes
As well as beautiful backgrounds that have been added to version Version fixed and stable means exactly what problems do not occur , God willing, Finally ... You can use Windows and ships only full -sized 680 MB Whatever your potential Version excellent and built with some of the important programs the last updates The version that is pre-activated and not Ttaj to interference from the activated Version masterpiece by all standards .... Advised to experiment and evaluation
Disclaimer:
This cylinder format: Standard ISO
You can burn them to CD or DVD through this program: UltraISO, PowerISO, ImgBurn (burn at 4x speed)
And you can burn them on a flash file using a program: Rufus
Download Here : CLICK ME
Sunday, July 12, 2015
Official GameMenu Launcher for Internet Cafe (w/ Tut) 2014
How to use.
Step by Step Guide : Credits to Owner Sb : ramlickatz
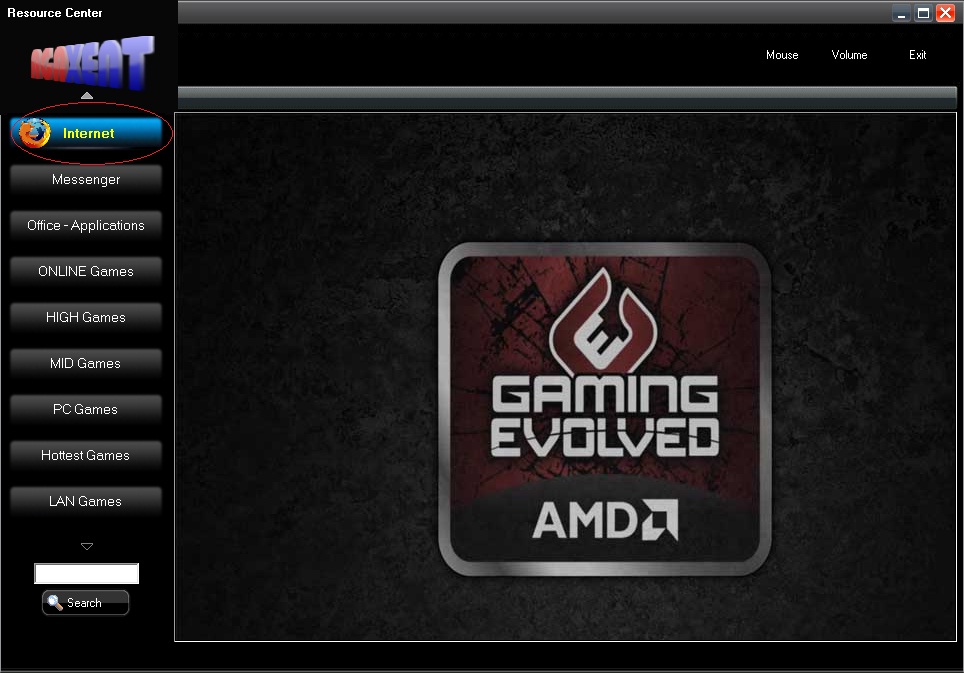
Simple Edit Backgroud
1) Open nyu menu folder
2) diba may (Back) na nka Jpeg jan = back.jpeg ang file
3) mag layout kayo kung anong gusto nyong ilagay na background kayo na bahala or ung mga nka wallpaper na, set nyo lng as (back.jpeg) overwrite nyo lng ung naka default jan
4) then save
5) run nyo na yong game menu...DONE!!!
Tut kung pano i edit ung mga icons sa gilid
DOWNLOAD ICONS TUT (Public)
Or Visit : http://www.iconarchive.com/
1. Download kayo dito ng Icons
2. download kau ng naka ico. file or icon file para ma attach nyo dun ung icon na gusto nyo by clicking dun sa gilid ng group ung parang may Chinese letter click mo lang un taz boom attach mo na ung ico. file mo...k na po ba?
eto na ung kinalabasan.
Here tut para automatic run tong program sa desktop nyo pag StartUp na ung PC nyo.
1. Click the Start button , click All Programs, right-click the Startup folder, and then click Open.
2. Open the location that contains the item to which you want to create a shortcut.
3. Right-click the item, and then click Create Shortcut. The new shortcut appears in the same location as the original item.
4. Drag the shortcut into the Startup folder.
5. Done!!!
Dagdag Info - How to open "2k8black.fac" (Credit darklordjed)
(kasi po kahit anung pindot nyo sa faceeditor e wala pong open ng file dyan.)
Right click the file "2k8black.fac"
Click Open With
Click Browse
And hanapin mo yung Faceeditorcorrected.exe
How to open "2k8black.fac"
(kasi po kahit anung pindot nyo sa faceeditor e wala pong open ng file dyan.)
Right click the file "2k8black.fac"
Click Open With
Click Browse
And hanapin mo yung Faceeditorcorrected.exe
(edit ko na lang to if meron pa kong useful information)
(kasi po kahit anung pindot nyo sa faceeditor e wala pong open ng file dyan.)
Right click the file "2k8black.fac"
Click Open With
Click Browse
And hanapin mo yung Faceeditorcorrected.exe
How to open "2k8black.fac"
(kasi po kahit anung pindot nyo sa faceeditor e wala pong open ng file dyan.)
Right click the file "2k8black.fac"
Click Open With
Click Browse
And hanapin mo yung Faceeditorcorrected.exe
(edit ko na lang to if meron pa kong useful information)
More added tutorials (Credit to darklordjed)
1. How to change Title
Syncexp.exe > Interface - Rename/Set up name at the Title box.
How to change size/color/font?
FaceEdit > Color and Other Settings - Title bar text color <applicable> font/size <don't sure if applicable>
2. Tips how to change logo
edit 1.png pero wag nyong alisin yung gray line kasi it belongs to the title.
3. To change Groups
Syncexp.exe > Groups - lagay muna sa box ung title pag Add and Rename highlight if delete
To change color bg, and fonts
FaceEdit > Color and Other Settings - sa Grouping yata or List View mo ieedit
4 To change buttons
Add skin / Display / Search
Syncexp.exe > Buttons - Check or Uncheck lang
to change color size and font
FaceEdit > Color and Other Settings - Independent Button
5. To change color
kasama na ata sa List View Text color pero unchangeable ata yung fonts.
6. tips sa background
para hindi paulit ulit or nagalaw yung pic everytime you maximize or minimize
Syncexp.exe > Interface tapos click Background and set to STRETCH.
7. How to put text dun sa pinakababa yung umiikot xD
Syncexp.exe > Interface
lagay mo yung text mo dun sa Bulletin box and wag mo na i click yung Bulletin font, hindi po napapalitan dyan (TS pa edit nito sa first page)
Bulletin font and color
sa Faceedit.exe > Color and Other Settings > Bar Announcement
*Notes
-sa mga Hindi makita yung font sa Faceedit.exe just maximize the window
-i haven't tried the banner
1. Download nyo dito CLICK ME
2. extract nyo sya sa loob ng "GameMenuLauncher" folder.
Yun nga palang sound eh para sa button lang yun.
2. extract nyo sya sa loob ng "GameMenuLauncher" folder.
Yun nga palang sound eh para sa button lang yun.
Tut On How to Remove (X) Button or Close Button. (Creadit to Public)
1. ) Open nyo ung (2k8black na file) sa loob ng Faces na folder (open w/ FaceEdit)
2. ) sa loob ng "2k8black" click kayo sa "color and other settings"
3. ) adjust mo lang yun "Close button top margin" set mo 1000 or kahit ano basta ma-hide lang yun X and - button. para walang error na lalabas.
2. ) sa loob ng "2k8black" click kayo sa "color and other settings"
3. ) adjust mo lang yun "Close button top margin" set mo 1000 or kahit ano basta ma-hide lang yun X and - button. para walang error na lalabas.
New Added Tuts (Credit to NOR3CA)
(Anti close X button and lock screen size - open the menu.exe from any Visual Basic then follow this)
http://www.youtube.com/watch?v=4dhx6OQkCMA
(Anti Close X button and Anti ALT F4 dun sa Menu.exe - open from any visual basic then follow this)
http://www.youtube.com/watch?v=GrXOWZnHpO0
Anti end KILL sa Launcher disable nyo lng eto ..
Remove TaskManager
1. First open your Command Prompt
2. Type "gpedit.msc"
3. Double Click "User Configuration"
4. Administrative Templates
5. System
6. Ctrl+Alt+Del Options
7. Remove Task Manager
8. Choose from two (disable or enable button)
9. Click "Apply" and "OK".. .
Copy and Paste Code:
Get
Dim cp As CreateParams = MyBase.CreateParams
Const CS_NOCLOSE As Integer = &H200
cp.ClassStyle = cp.ClassStyle Or CS_NOCLOSE
Return cp
End Get
End Property
Idagdag ko lang tuts isa pang way pra di maclose maquit or ma ALT-F4 yung game launcher natin eto.(Creadit to NOR3CA)
Open START menu.
Click on RUN button.
In the Run command box write “REGEDIT“.
Now Press Enter key from your keyboard to open the Registry Editor.
Now from the left side move down according to the given format.
HKEY_CURRENT_USER --> SOFTWARE --> MICROSOFT --> WINDOWS –> POLICIES -> CURRENT VERSION –> EXPLORER
Then on the right side of Registry Editor, Right Click your mouse to open a list.
Now go to NEW –> Dwood Value.
Name this value as “NoClose“
After creating click on it and give Value Data 1
Now Reboot your PC and your Turn Off and ALT+F4 options are disabled.
Para ibalik repeat steps then delete lang "No close" then log off ..login
Remove TaskManager (meron option neto sa cafesuite just check it)
1. Windows KEY + R = run
2. Type "gpedit.msc"
3. Double Click "User Configuration"
4. Administrative Templates
5. System
6. Ctrl+Alt+Del Options
7. Remove Task Manager
8. Choose from two (disable or enable button)
9. Click "Apply" and "OK".. .
TUT KUNG PANO MAWALA YONG TASKBAR SA BABA NG WINDOWS (Born2Hack)
1. Open NotePad type this taskkill /f /IM explorer.exe
2. Save as .bat lagay nyo muna sa My Documents.
3. Click Start > programs > Right Click mo ung Startup > open
4. Copy mo ung na save mo .bat na tapos paste mo d2 sa startup folder.
5. Restart PC...Done
Credits to all Sb and Owner
Feedback Please
DLL-FiLes Fixer 3.2.90.3065 + Key
DLL-FiLes Fixer 3.2.90.3065 - The problem with our service is that the errors users are getting with their dll files is most of the times just the symptom of the problem and downloading and installing a dll will many times never solve the real problem. So starting today, users coming to our website will be able to download the Dll-files.com FIXER – which is a free software developed to install your missing dll-file and correct all the errors related to it, delivering a complete solution.
Afterwards you may choose to buy the full version that will solve many other problems on your computer. We hope, with that, that users will be more satisfied and have all their errors related to the missing dll-file solved. It’s very important to us to give our users value and keep you satisfied, so we welcome you to share your thoughts, doubts and feedback about the Dll-files.com FIXER.
FEATURES
- Optimize Registry in smart and invariably the simplest way.
- Defrag and optimize system Registry.
- Fix all the problems and create an error-free Registry.
- Relieve from application, system crashes and PC hang-ups.
- Prevent from the unwanted prompts appearing time and again.
- Improve system response time.
- Speed up system performance.
- Repair and clean Registry from unwanted and invalid Registry entries
NEW
not-available
REQUIRMENTS
OS: Windows All
FILE-SIZE
4.7 MB
Software-Crack :CLICK ME
How to download? :http://sanlimbox.com/how-to-download/
CCleaner 5.07.5261 Setup + All Editions Crack
Piriform CCleaner
CCleaner is the number-one tool for cleaning your Windows PC. It protects your privacy online and makes your computer faster and more secure. Easy to use and a small, fast download. Piriform releases regular updates for CCleaner with many improvements.
How to Crack:
1. Install CCleaner 5
2. Run CCleaner 5 All Editions Universal Crack
3. Select the edition to which you want to crack
4. Click Crack button & wait till a message pops
5. That’s all
1. Install CCleaner 5
2. Run CCleaner 5 All Editions Universal Crack
3. Select the edition to which you want to crack
4. Click Crack button & wait till a message pops
5. That’s all
Download : CLICK ME
Subscribe to:
Posts (Atom)